Tuesday, May 26, 2009

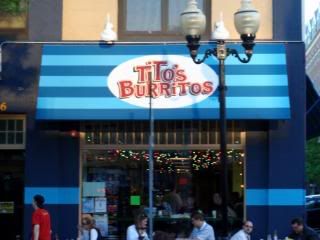
Tito's Burritos - Morristown

Photobucket


Every week I look forward to reading about the new featured restaurant in our local newspaper. A couple of weeks ago I read about a new Mexican place called Tito's Burritos that just opened in Morristown. I didn't know of this one before, but there is also one just minutes from my office in Summit. Now that I've been here, this news is very exciting - I could have my Tito's fix for lunch or for dinner!

Photobucket

Photobucket

Photobucket

Photobucket


Tito's cuisine may be Mexican or Tex-Mex, but the atmosphere is one of a Hawaiian or Californian surf shop. There are two flat screen TV's - which were showing a skateboarding video, a huge marlin on the wall, as well as surfboards. These are just some of the fun items that adorn the restaurant. The atmosphere is fun and relaxed and the friendly staff illustrates that. Everyone seemed to really enjoy working there. There is something for everyone at Tito’s and it appeals to people of all ages. The night I was at Tito's, there were families with young children, teenagers and adults of all ages.

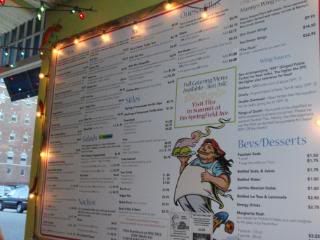
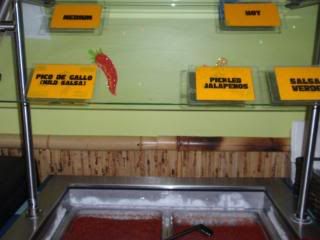
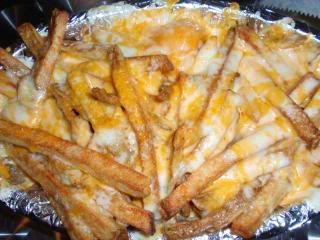
The menu is extensive and very unique. They serve burritos, tacos, quesadillas and salads - they even have fries and wings! Any burrito can be made without a tortilla, with a low carb tortilla, or as is. They can be made "wet" which means special sauce and cheese added, or "green" which means added guacamole. There really is a burrito and taco to satisfy every palate, the most unique being the Blackened Salmon Burrito. I ordered a San Quentin which is a ground beef burrito with a choice of black or pinto beans, cheese, yellow rice and pico de gallo. It was very tasty, not an obscene amount of cilantro and very neat. I thought I would have to use a fork and knife but all the fillings stayed neatly inside the tortilla so it was not messy at all. My boyfriend ordered The Big Easy. This was our favorite out of the two we ordered. It's a blackened chicken burrito with yellow rice, cheese, lettuce, pico de gallo and ranch dressing. I think this was the most popular burrito that night because I heard it ordered over and over. We also tried the guacamole and the salsas from the salsa bar. All of them were very good. The pico de gallo was my favorite, very tasty with just the right amount of salt. I think the most surprising thing we tasted were the fries. Who orders fries at a Tex-Mex restaurant you ask? We do when they are covered in cheese and served with a chipotle dipping sauce. If you ask me, that sauce should be on everything! I think it would have been perfect in my burrito. So Tito, maybe you should add that to your menu with all the other add-ons!


Photobucket

Photobucket

Photobucket

Tito's does not serve alcohol but they are a BYOT - Bring Your Own Tequila and will gladly make you a frozen Margarita. If alcohol isn't your thing try a Mexican soda or some refreshing lemon or limeade.

Tito's Motto is "It's all good!" and everything that we tasted was certainly better than good. I plan on becoming a regular at the Morristown location and I hope to see you there!


My review is also posted on Jersey Bites! Click here to check it out! Jersey Bites is a great website for recipes, NJ restaurant reviews, blogging events and more. Make sure you stop by!

Tito's Burritos - Morristown

Photobucket


Every week I look forward to reading about the new featured restaurant in our local newspaper. A couple of weeks ago I read about a new Mexican place called Tito's Burritos that just opened in Morristown. I didn't know of this one before, but there is also one just minutes from my office in Summit. Now that I've been here, this news is very exciting - I could have my Tito's fix for lunch or for dinner!

Photobucket

Photobucket

Photobucket

Photobucket


Tito's cuisine may be Mexican or Tex-Mex, but the atmosphere is one of a Hawaiian or Californian surf shop. There are two flat screen TV's - which were showing a skateboarding video, a huge marlin on the wall, as well as surfboards. These are just some of the fun items that adorn the restaurant. The atmosphere is fun and relaxed and the friendly staff illustrates that. Everyone seemed to really enjoy working there. There is something for everyone at Tito’s and it appeals to people of all ages. The night I was at Tito's, there were families with young children, teenagers and adults of all ages.

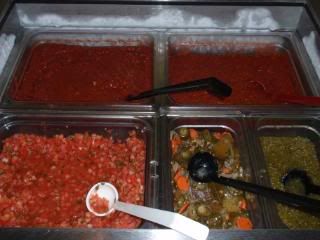
The menu is extensive and very unique. They serve burritos, tacos, quesadillas and salads - they even have fries and wings! Any burrito can be made without a tortilla, with a low carb tortilla, or as is. They can be made "wet" which means special sauce and cheese added, or "green" which means added guacamole. There really is a burrito and taco to satisfy every palate, the most unique being the Blackened Salmon Burrito. I ordered a San Quentin which is a ground beef burrito with a choice of black or pinto beans, cheese, yellow rice and pico de gallo. It was very tasty, not an obscene amount of cilantro and very neat. I thought I would have to use a fork and knife but all the fillings stayed neatly inside the tortilla so it was not messy at all. My boyfriend ordered The Big Easy. This was our favorite out of the two we ordered. It's a blackened chicken burrito with yellow rice, cheese, lettuce, pico de gallo and ranch dressing. I think this was the most popular burrito that night because I heard it ordered over and over. We also tried the guacamole and the salsas from the salsa bar. All of them were very good. The pico de gallo was my favorite, very tasty with just the right amount of salt. I think the most surprising thing we tasted were the fries. Who orders fries at a Tex-Mex restaurant you ask? We do when they are covered in cheese and served with a chipotle dipping sauce. If you ask me, that sauce should be on everything! I think it would have been perfect in my burrito. So Tito, maybe you should add that to your menu with all the other add-ons!
Photobucket

Photobucket

Photobucket

Tito's does not serve alcohol but they are a BYOT - Bring Your Own Tequila and will gladly make you a frozen Margarita. If alcohol isn't your thing try a Mexican soda or some refreshing lemon or limeade.

Tito's Motto is "It's all good!" and everything that we tasted was certainly better than good. I plan on becoming a regular at the Morristown location and I hope to see you there!


My review is also posted on Jersey Bites! Click here to check it out! Jersey Bites is a great website for recipes, NJ restaurant reviews, blogging events and more. Make sure you stop by!

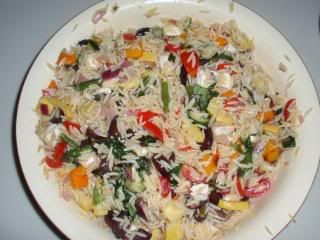
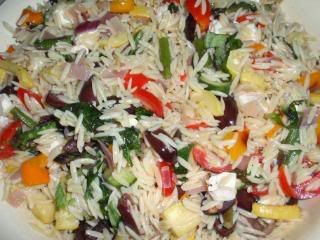
Roasted Veggie and Orzo Salad

Photobucket


Last summer my friend Catherine and her hubby invited Steve and I over for a barbeque. Everything was fabulous but it was her orzo salad that I was thinking about for days. It was a mixture of perfectly roasted veggies, salty kalamata olives and pieces of soft and creamy fresh mozzarella. She doesn't really have a recipe for it and she makes variations all the time. Any veggies or herbs can be used and I think you could even grill the veggies and then cut them up and mix them with the orzo. This recipe makes a ton so if you don't like leftovers (although this is great leftover) cut this recipe in half.

This is what I did but feel free to mix it up any way you like.

Roasted Veggie Orzo Salad

Ingredients:

2 small zucchini, cut into approx 1 inch pieces
2 small yellow squash, cut into approx 1 inch pieces
1 bunch of thin asparagus, ends trimmed and cut into approx 1 inch pieces
1 package of mixed baby peppers, cut into approx 1 inch pieces
1 red onion, diced
6 cloves garlic left in their skins
1 cup kalamata olives, sliced in half
1 carton of grape tomatoes, sliced in half
1 8 oz ball of fresh mozzarella, cut into bite sized pieces
1 pound of orzo
1 small bunch basil, chopped
extra virgin olive oil
salt and pepper


Directions:

1. Preheat oven to 400 degrees.

2. Distribute zucchini, squash, asparagus, peppers, onion and garlic between two baking pans. Drizzle with olive oil and season with salt and pepper. Roast for about 15 minutes or until tender, tuning them when they are halfway through cooking.

3. Meanwhile, cook orzo in salted water, drain and put in a large bowl. Toss with oil to prevent sticking.

4. When veggies are cooked, let cool for a few minutes and remove garlic and set aside. Add cooled veggies to cooled but still warm orzo. Add olives, tomatoes and mozzarella.

5. In a small bowl squeeze garic from their skins, add a tsp of salt, some pepper and a couple of tablespoons of olive oil. Smash to form a paste adding more oil as needed. Add garlic paste and basil to veggie orzo mixture and mix. Season with salt and pepper to taste.


Thanks Catherine for a great recipe!!!


Photobucket


Friday, May 22, 2009

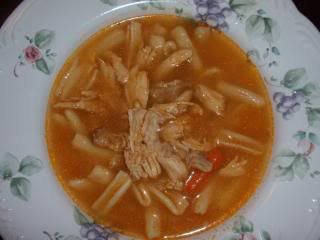
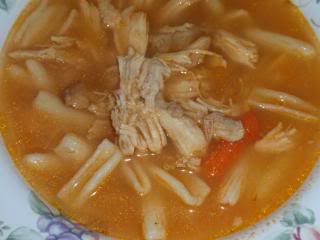
Mom's Chicken Soup with Cavatelli

Photobucket


A couple of days ago I posted about the chicken and potatoes I made in the oven. In the package of chicken that I bought had a whole chicken that was cut up. I used part of it in my roasted chicken dish (enough to feed two) and the rest of the chicken I used to make this soup. I had a large chicken breast, two wings and a thigh and just to make sure I had enough meat I added an extra chicken breast that I had. I should have listened to my mother and not used so much water because since I didn't have a whole chicken the broth was a little light and bland. No big deal, I threw in a few chicken bouillon cubes. I'm not going to give you an exact recipe for this but I think you'll get the idea.

Add chicken (with bone and skin) to pot with enough cold water to cover. Leave the skin on but if there is a lot of excess skin or fat just trim that off. To the pot add whatever veggies you like and you don't have to get particular about dicing. I cut them into large chunks. I just used two tomatoes, carrots, onion and celery but you can use leeks, mushrooms, garlic, whatever you like. I added bay leaves but you can add parsley or thyme also if you like it. Let it come to a boil and then reduce to a simmer. Let it cook until chicken is cooked through (approx 1 hour, depending on amount of chicken). Remove chicken to a dish and let cool. Taste soup for seasoning. Add salt, pepper and if you think it needs a richer taste add bouillon (before you add the salt). When chicken is cool enough to handle shred with two forks (or your fingers) or dice into small pieces. I prefer it shredded because that's how my mother always did it. I used my immersion (stick) blender and blended all the veggies (except for one lone carrot...oops!) but you don't have to do that. You could have cut your veggies smaller and left them whole. Add shredded chicken to the pot. In separate pot cook pasta or rice. I used cavatelli (we pronounce it gah-vah-deel - don't ask, we just do!) and that can be found in the frozen section with the ravioli and tortellini. I've heard this suggested somewhere and called "Italian chicken and Dumpling soup". I wouldn't call this that because it wasn't thick enough for that but you could certainly make a roux and thicken it up. Anyway, I'm getting distracted. If you are only making a small amount of soup you could cook the pasta or rice right in the pot with the soup. I made a large amount so I could freeze it and I didn't want the pasta to get mushy.

It turned out delicious. I definitely recommend using the cavatelli but they are larger than most pasta that I would normally use and so one package was just enough but I would have liked a little more. Maybe we just have big appetites!

Photobucket

Thursday, May 21, 2009

Fiddleheads - Freaky or Fabulous?

Photobucket

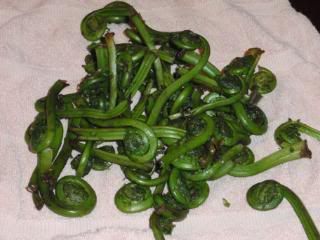
What are fiddleheads? I know you're all wondering because until 2 weeks ago I never heard of them before. I first saw them on a blog and thought they looked strange but kinda cool. Never thought I'd come across them but to my surprise one of my local supermarkets had them. I bought a small bunch just to see what they were like but they intimidated me and sat in my fridge for three days.

Photobucket

Finally last night I decided that I would just suck it up and try them. If they didn't taste good no one was going to force me to eat them! Steve already said he wasn't going to eat them. This was his face when I showed them to him.

Photobucket

I can't say I blame him. That was probably my face when I first saw them!

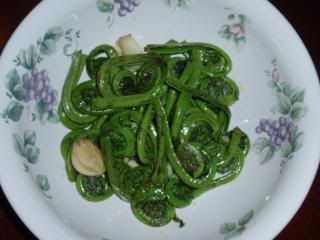
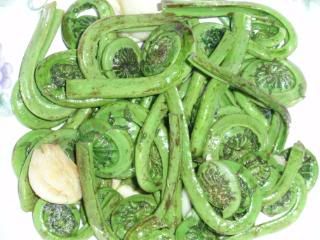
After doing some researching and speaking to some friends on bakespace I found out that I should remove the brown papery skin and rinse them really well. There wasn't any papery skin on them and so I was a little confused. There was a fuzzy flowery type of stuff (for lack of a better word) inside the coiled part. I think that's what freaked me out because I wasn't sure if I was supposed to take that off or not. Everytime I tried to uncoil it and wipe that off the fiddlehead broke. It kind of snapped like a string bean. Hmmm...so, I just washed them, left that part alone and cut off the ends of each one like I normally do for the stems of broccoli rabe. I boiled them for two minutes and then sauteed them in garlic and oil and sprinkled them with a little salt.

Photobucket


They tasted good. I was surprised. They weren't as bitter as I thought they would be. They did taste similar to the stems of broccoli rabe but milder like a string bean. I know, two totally different things but I don't know how else to describe them. The problem for me was that they looked really weird. I kept getting these images of them turning into worms or coming to life and freaky and snake-like. So, I couldn't eat them. They just looked like something so foreign and I couldn't trust it.

I still think you should try them for yourself but you don't have a lot of time. They are only around for a short amount of time and I think that window is closing. If you do try them let me know what you think. Are they fabulous or do you agree with me, they are just too damn freaky to eat?


Tuesday, May 19, 2009

Oven Roasted Chicken and Potatoes

Photobucket


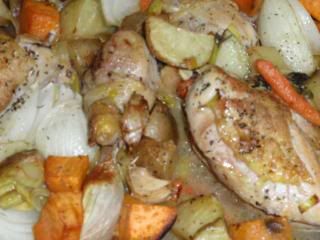
Yum, Yum, Yum! This chicken was so tasty and the sauce was perfect for dipping bread in. There isn't much of a recipe for this. Once again, I just threw in what I had and it turned out perfect! I bought a whole chicken cut up and split it up so that we would have two meals. I don't like the taste of reheated chicken so I didn't want leftovers. I made this for two but you can use as much chicken as you want just increase the amount of liquid if you want some juice (which I highly recommend!) I left some of the skin on the chicken because I didn't want it to get try but you can do this without the skin if you like.

Ingredients:

1 chicken breast, (all pieces have bone in & trimmed of extra skin and all fat)
2 chicken legs
2 chicken thighs
a couple of sprigs fresh oregano (you can use dried, I just threw it in)
a few shakes of dried italian seasoning
Mrs. Dash Table Blend
salt and pepper
dry white wine
chicken broth
1 large sweet potato, cut into large pieces
handful of baby carrots
4 -6 yukon gold potatoes, cut into large pieces
1 onion, cut into large pieces
handful of chopped leeks (threw them in only because I had them)
8-10 cloves garlic cloves in peel
extra virgin olive oil

Directions:


Preheat oven to 350 degrees.

Season skin side of chicken with salt, pepper and Mrs. Dash. Heat a large oven safe frying pan, drizzle in some oil and place chicken in the pan skin side down. Don't touch it. Leave it there for about 5 minutes or until chicken starts to brown. Meanwhile, add in garlic, and potatoes, carrots and onions around the chicken. Season them with salt, pepper, and Mrs. Dash. Turn chicken and potatoes and season the second side. When chicken is browned turn over again and add wine ane chicken broth. Add enough so that the liquid is about halfway up the chicken. Reduce heat and allow to simmer for about 5 minutes until some of the liquid is reduced. Add pan to hot oven and cook for about 40 minutes or until juices run clear. Cooking time depends on how big your chicken pieces are and how much chicken you have.

Photobucket

Photobucket

Teeny Tubitini with Veggies

Photobucket


10 years ago I started asking family and friends for recipes. I wanted to create a cookbook with recipes from people who are special to me. You'd be surprised how many people couldn't be bothered. I was very disappointed that despite the letter I mailed many people in my family (distant relatives as well as close ones) I only got a few recipes and those were from the ones that I pestered. Since it was so difficult to get recipes from family, whenever I tasted something I liked, I got in the habit of asking people right then and there to tell me how to make it and I wrote it down. This was one of the first recipes I got my hands on. It was given to me by a neighbor and very close friend of the family, Joanne. I remember the day she made it. I stopped by her house and this is what she was making for lunch. She invited me to join her and her family and I graciously accepted. It was delicious!

Oh, one more thing. I know that canned vegetables are not as good as frozen and for the most part I agree. I can hear you all now, tsk tsk, but listen, in my humble opinion, baby peas in a can have so much more flavor than frozen peas. I prefer Le Sueuer peas and only use these for this dish and also when I make macaroni and peas (recipe to come in the future). The frozen ones just don't work here but be my guest and use whatever you feel comfortable with.


Ingredients:

1 large clove garlic, chopped
1 medium onion, diced
olive oil
salt and pepper
Mrs. Dash table blend
1 can of peas
1 cup chicken broth
1 small zucchini
1 package fresh mushrooms, sliced
1/2 lb tubitini or any other small pasta

Saute garlic and onion in oil.

Add zucchini, mushrooms, salt, pepper and Mrs. Dash to pot. Let cook until zucchini is soft.

Add whole can of peas with juice and chicken broth. Let cook for a few minutes until it’s heated through.

In seperate pot cook pasta, drain (leave some water) and combine with vegetables. (shouldn’t have the same amount of liquid as soup but should be wet)